As an Amazon Associate we earn from qualifying purchases.

How to Remove a Wall Oven? Whirlpool, Frigidaire, Kitchenaid… 2023
Do you need to know how to remove a wall oven? If so, then read this blog post for some insight into the process. You will find out what tools are needed and how to prepare your kitchen before starting the job.
The costs of removing an oven can be expensive, and you also have to find a qualified professional service company who will ensure your satisfaction with their work! So why don’t you try to do it yourself with my suggestion below!
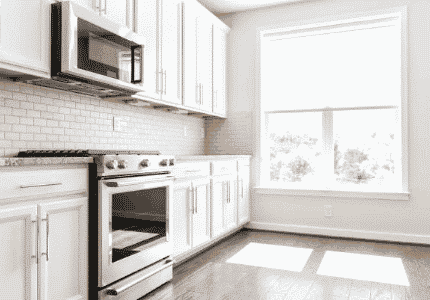
What is a wall oven?
There is a new type of cooking appliance that you can install into your kitchen, called the wall oven.
They are easy to use, come in various sizes depending on how many people will be eating at one time, from small to large families with children! Some even have glass doors, so nothing gets missed while watching TV or just trying not to oversleep because we know how hard those days were before these miracle machines came along.
A wall oven has arrived as an answer for all our needs—previously daunting tasks such as building fires had been made much more manageable. The reason is that putting food inside became something anyone could do without bending down low enough to make eye contact with strangers.
What do We need to Remove a Wall Oven
Electric ovens are the most energy-inefficient cooking equipment in a kitchen. They use four times more than refrigerators and dishwashers combined, but less than microwaves! This is because 120-volt circuits power the latter.
However, an electric stove takes 220 to 240 volts making it much more complex when disconnecting from the power source. The reason is that you need multiple tools in order not only to detach its cords.
However, it also removes metal plates protecting fuse boxes that may have been blocking these terminals if they were installed beforehand already – this can cause short circuit damage if mishandled!
The toolbox is full of items you need before starting this project, so follow these instructions carefully.
- Electrical tape
- Standard tape
- Noncontact voltage tester
- Wire cutters pair
- Wrench
- Screwdrivers
Your oven is a powerful little thing! It can make you some delicious food, but if something goes wrong with it, there’s no guarantee that your house will be safe.
So don’t take risks when working on electrical appliances like this one- always use caution and never touch anything unless given permission by an adult or professional electrician who knows what they’re doing.
To start things off smoothly, let me explain how these tools help prevent accidents, if any arise during our work together today. The Electric Tester has lights that show whether power enters into each circuit, while Testing tells us if everything inside works appropriately, so we don’t fry ourselves along the way.
The screwdrivers are indispensable for disassembling the oven. If you don’t have one, a scissor might work too, but we always recommend getting yourself some good quality tools, so they last longer and make life easier!
To take apart your range hood or wall oven in just about any way imaginable, YOU must HAVE SCREWDRIVERS!!!! Without these essential bits of kit, there would be no point whatsoever because who wants complex?
They come with points on them, making everything much simpler if ever needed later down the road when reassembled again – this time without needing assistance from others.
With the cutters, if you do not have you can use the knife. However, electrical tape is also crucial, and we haven’t found any replacement options if you don’t have it on hand!
An excellent place to get these tools would be from an electronics store or supermarket where they may carry them in stock – but make sure that when cutting wires (especially aluminum). There’s no contact with metal parts as this will cause sparks which could ignite a fire/explode rucksacks, etc.
Step by Step “How to Remove a Wall Oven”
1) Disconnect electricity supply
You are a professional, so I know you’ll be able to tackle this project like one. So here is how we can complete the job successfully together!
The first step is to guess, never skip it or else risk your life and those around you. For example, with an oven and other small appliances such as microwaves, they can be dangerous to work on if not handled properly.
Electrical: This type would have a little easier removal process because all we need to do here are turn off electricity powering controls in addition to gas running through them (though some models might require more than just shutting these things down).
Gas Ovens- this isn’t usually something people think about unless there’s been leaking for a while already, so before taking any measure against cleaning up potential leaks, makes sure everything like knobs, etc., is disconnected!
Unplug your oven and turn off the power supply before repairing or replacing it. Make sure not to use it again until after we have checked that everything is working correctly! First test with an electric tester if there are no other issues present – since this should automatically trip a breaker for us when done Testing without turning anything on or off inside of their circuit box (unless specified).
Another way to avoid the risk of an accident with your oven is by turning off its power source. Even though you may not have a dedicated circuit breaker for it.
There should still be some switch near where all other cooking appliances are connected to disconnect wall ovens from their wires and outlets if necessary. Usually, this control box has red markings on matching terminals corresponding with “Off” as well!
If you are lucky enough to be working on this gas oven, turn off the supplied knob. The location of knobs usually rests behind or beneath your model and will need some wrenching with care to remove a wall oven from its socket so that we can cut off power remotely should anything go wrong (that means don’t touch!).
Once disconnected, make sure not to have any children come near while removing tape marked adequately as “Circuit Breaker” placed strategically around space where hazards lie, waiting for anyone less careful than yourself! Write down instructions carefully, too.
There may not always seem like much else needs doing after turning these things off but remember: They’re still alive until someone turns them back on again.
2) Disassemble the oven door
To avoid burning yourself on hot oven doors, first, check that there are no hinges or sliding parts attached. Then use the screwdriver to remove a wall oven safely!
With your flathead screwdriver, you’ll be able to get into the locked door in no time!. Pry apart, turning it towards your open oven door so that you can raise its hinges upwards on either side until they meet resistance as though someone buffers closing their hands into tight fists before letting out all of one’s strength at once. If not already done so themselves!
There are many different types of screws available but remember which set goes back because these will be smaller than any other kind, making them easy targets should we lose track or drop anything else along our way.
Once you’ve removed all eight screws from the outside, carefully open up your oven door and remove a wall oven.
Carefully take the frame apart, paying close attention to its many sharp edges.
If you are stuck in the oven door hinges, take note that there will be two screws on either side and two more placed vertically near an edge to loosen them. Gently unscrew these items until they come free without too much force- if possible, try turning your handle before doing this so as not to damage any parts!
To replace the old door, you’ll need a new outer and inner frame. First, adjust both of these components to match up with one another correctly, then attach them in place!
When the bottom frame piece has been unscrewed and replaced with a proper match, you’re ready to screw it back in place! First, make sure that no visible screws are sticking out from below like before.
The first step is to hold the hinge in place, then slide it 45 degrees. Next, insert a screw on either side of where it meets with a bracket and hammer them down until secure!
With the door lowered, you can move the lock of your hinges so that it is as close to a horizontal position as possible.
After you have removed the oven door, set them aside carefully. It is easy to touch and drop when on a ground-level surface!
3) Remove Screws
Now look for the screws that attach those trims around your oven and remove them from their mounting location.
Once you remove the trimmings on your oven or even fake wood pieces attached to its surface nearby, you can also pry and chisel these up with a sharp knife being careful not to hurt yourself in the process.
With each nail and pin removed, the oven is becoming more accessible for you. When removing both ends of a tab control panel to remove it from its mountings on either side (you can buy these separately), make sure not only does this fit through your opening.
However, it also has room behind it so that wires coming out do not get tangled up with other components nearby or any exposed wiring within our work area.
4) Cut Electrics Wires
First, make sure that power is off when you cut by testing the oven twice – if not lit up, the warning light means there’s an active current running through your wires, and they need to be safely disposed of by local laws or regulations!
You can always reconnect the wires if you need to fix them, but before cutting anything, make sure they’re connected in their proper place! Take a photo for future reference.
A professional tone of voice is essential while trying to fix an uneven issue like this one – don’t get any ideas about Twisty Tiers or whatever else might help me out here.
5) Remove the oven
When you are done with this part, your oven will be as good as new! The final step is to remove the screw that attaches the base cover plate and electrical box on top of it, with one last little Phillips head screwdriver bit around here somewhere.
The first thing I need from my assistant (or myself if using their laptop) before starting: Remove all wire ties holding down/ restraining insulation lengths for me to get access into those tight spaces behind where walls meet ceilings throughout our entire 500 sqft home installation area.
To remove a wall oven from your kitchen, don’t yank on any wires. First of all, untwist wire connecting in an electrical box by pulling gently towards yourself while aligning so as this does not pull too far and cause damage!
After doing this, carefully reach out with one hand plunged into dead-end terminals (or someone else’s) until unplugging is complete. Then have them hold onto their end for safety reasons since we recommend asking someone if they are more stubborn prongs remaining inside.
Ovens are few and far between in homes, as they’re typically connected to the electric wiring of your house. It’s easier for someone installing outlets on walls or rewiring your kitchen, though- because you can just run cables from there!
6) Clean wall cavity
If you want to clean your oven, take a dry paper and wipe off any dust from the inner surface. Then soak it in water with dish liquid or mild bleach solution before wringing it out thoroughly so as not to put unnecessary pressure on these delicate parts. We’re still trying to figure out how best to avoid rust at all costs here!
7) Secure wires
You’ll need to deal with the electrical wiring after you clean up any mold on your walls. Use tape or if there’s an oven coming in, make sure it has power adjustment so that nothing gets fried!
Be Careful When You Remove a Wall Oven
– To remove a broken oven, the technicians have to unplug it from the wall and physically take apart each part.
– It can be removed at home
– If you’re looking to hire an extra pair of hands, our team is ready and willing. We can do the project quickly with your safety in mind!
– Don’t forget to check for electricity whenever you work with wiring!
– One of the first things you should know about this work involves removing screws and disconnecting the wiring.
– Keep the oven away from pets, children, and vulnerable adults once it has been removed.
How to Remove a Double Wall Oven
Quick answer for removing a double wall oven.
Disconnecting the power to your oven is a good way of ensuring there are no surprises when you’re working with it. To turn off, remove any heating elements inside and disconnect the trim at the front by pulling up on both sides while still connected through their wires attached near where they come from underneath the tops or bottom cabinet edge.
It’s also imperative that somebody who knows what needs doing would have done themselves first if someone else were using this appliance for cooking-related purposes yet again later down towards its lifespan (or before). Just as how yours indeed did today!
How to Remove a Wall Oven Microwave Combo
- Removing the oven from its current location.
The first thing you need to do is turn off the circuit breaker powering the oven and inspect the work area for aluminum wiring, which can be extremely dangerous if mishandled. The next step is to disconnect your oven from any existing wiring that may remain connected by unscrewing the wire nuts.
- Removing the wall oven from its current position
It can be tricky and require some workforce. It has been noted that it is best not to try prying your oven away from the wall yourself because you could potentially damage your home or even cause injury. Instead, contact a local professional who specializes in doing this sort of work to perform the heavy lifting on your behalf.
Suppose you don’t think you will need an expert do-it-yourselfer. In that case, some DIY sites and forums may offer further assistance and detail on removing a wall oven microwave combo safely and efficiently by yourself.
- Reinstalling the oven in its new location
It is nearly as tricky as removing it. First, you will need to install the mounting brackets on your wall studs before bringing the oven back into place.
The next step is to position the oven between the brackets and elevate it until you can insert a screw through each bracket hole and tighten each securely with an Allen wrench. If you are not comfortable with this work, you should contact a professional installer to do your wall oven microwave combo installation.
- Secure it well
Once the wall oven microwave combo is securely in place on the brackets, and you can go ahead and reconnect it to its power supply wiring using wire nuts or any other connector that is part of your home’s electrical design.
Before turning the circuit breaker back on, it is recommended that you test the oven to ensure that everything works properly.
- Clean up
Lastly, clean up and admire your new wall oven microwave combo! You may want to paint any exposed screw heads to make them less visible and prevent yourself from getting scratched when reaching for plates and other items in your cabinet.
How to Remove a Built in Double Oven
Firstly, you also need to prepare all things needed for removing the wall oven above.
Then, you should remove the power supply. After that remove the oven doors and then remove the electrical wires and the base cover plate. After finishing those steps, you should clean the area, make sure the connectors.
What can I do with an old Wall Oven
- Make it as a storage container
A old wall oven is a great way to store large quantities of food if you don’t want your refrigerator or freezer. A high capacity means it can keep up without being overwhelmed with items, while its compact size makes this small appliance look neat as well!
- Donate to charitable organization
You can donate your oven and get a tax deduction for it! There are many charities in need of used, working kitchens. It’s easy to find out how they will care if you just input their name into Google or Bing search engine.
There’s even an app on iPhone called “Donation Lookup,” which makes finding reputable charitable organizations more accessible than ever before so that people like yourself who want to do good by giving away something no longer needed.
You would know where precisely to send whatever appliance(s) may be available through these hard-working groups right here at home.
- Give old oven back to store
The best way to get a new oven is by hiring the staff at your local electronics store. They will come in, take out all of your old appliances for you and bring nothing but dust!
You’ll never have to worry about what to do with an old oven again when they’re finished.
Usually, this service comes included as a part-of-the deal too. Because most people don’t want another trip back home or running around town looking for someone who does removal services like ours here so regularly that we can offer same day pickups from anywhere within proximity limits.
- Sell your old wall oven
If you have old wall oven that is still in good condition, don’t throw away the receipt. People who need these items are often on Facebook Marketplace and will contact you if they see your ad to sell used items!
You can also post it yourself at garage sales or through friends to find customers near where you live – remember, though, that before selling anything, make sure its usability has not been compromised by wear-and-tear over time.
Where to buy a Wall Oven?
The best place to buy a wall oven is from an appliance store. They usually have a wide selection and can give you expert advice on what ovens work well for your needs. Make sure the store offers a warranty that is at least one year long. Some stores might have special deals going on, so it’s worth it to shop around for the best price.
Of course, if you are looking for a wall oven to match your kitchen decor, you may have trouble finding something off-the-shelf. In this case, it would be best to have an appliance store custom-build one for you. Many appliances stores can also offer installation services at their location or yours.
While it may seem like a good idea to buy an oven at a discount store like Amazon, and Walmart, the quality of the product is not as good, and you probably won’t get support after your purchase.
An oven can be expensive, but remember, you will use this appliance every day for many years! If the store does not offer installation, you might want to hire a professional oven installer.
FAQs on how to remove a wall oven
Q1: Can you remove the oven bottom?
When you remove the bottom panel of your oven, be sure to inspect and clean all parts. If any screws are holding it in place or with just a simple turn of an Allen wrench can come out as well for easy access!
Q2: How can I clean the glass on an oven door?
If you’re looking to get your oven clean, try mixing 1/2 cup baking soda with 3 Tbsp water.
Spread this paste inside the oven and leave it on for several hours before wiping away any residue with a cloth or sponge that has been dipped in warm soapy water.
Next, spray some cleaning vinegar all over; let it sit for 5 minutes, then wipe off as needed!
Q3: How can you remove an oven base?
There are two knurled hold-down screws at the rear of this oven. If they’re too tight to remove with your fingers, use a coin or screwdriver for extra leverage and lift on both sides until it’s clear from where you can reach in between yourself without getting burned by hot air escaping around edges!
Conclusion
If you find how to remove a wall oven is more complex than expected, don’t worry! After following these steps and completing the tutorial on removing a range hood from behind one (I found this helpful!), we can help with installation or repair.
Just think of our guide as an invaluable resource when tackling any DIY project at home like installing new appliances in your kitchen; if there are parts damaged during removal, such as doors, then just exchange those instead – no need for returning them because they work perfectly well now too.
See more:
- What is The Best Wall Ovens Reviews in 2022 – Tips and Guides
- Top 10 The Best Double Oven Reviews in 2022
- Top 5 The Best 27 Inch Double Wall Ovens Reviews in 2022


